#7 - House Sculpting & Texturing
The main focal point of the scene is the cottage, which I blocked out months ago, so it was finally time to get it done.
I started off by making the 2(½) tiling materials I'd need. One of these is the plastery wall texture, and a mossy variant, and the other is a tiling wooden plank material, which doubles up as a trim sheet.
The plaster material was a very simple Substance Designer graph, with a variant that overlays the moss material from the previous posts. This is used in-engine to paint in some variations using a Vertex Painting material.
The trim was sculpted in Blender and then baked and textured to a plane in Substance Painter. I created a simple stylised wood "Smart Material", which I could use to get a consistent base for all the wooden elements I still had to make.
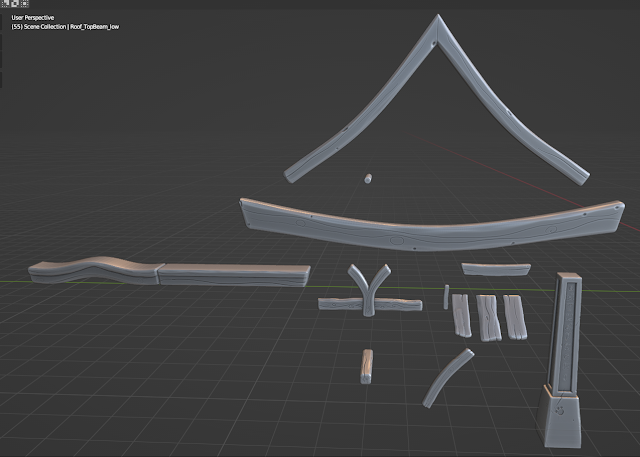
Those wooden elements were the next job, so I split them off from the blockout mesh, and laid them out separately, as such:
I then went through each one in turn, re-meshing them to very high polycounts, and sculpting on some simple "woody" details, with a combination of Draw Sharp, Scrape, Masks, and Alphas:
This sculpted detail, when baked onto the low-poly versions would do much of the heavy lifting when it came to texturing them in Substance Painter.
I UV'd all of these pieces to a single 4k map and brought the lot into Substance Painter as one object. This made it very easy to bake everything, apply my Smart Material from earlier, and then make adjustments to all of the wooden pieces at once, rather than maintaining multiple different Substance Painter projects.
The result in Blender came out like this:
I then repeated the process for the rest of the non-tiling house parts:
The next step was to do the Roof. Luckily, I had made a customisable roof material in Substance Designer in the past, so I was able to reuse that for this project.
At first, I tried to simply apply the texture to the flat roof mesh, hoping it would be good enough, but it really wasn't. It was very obviously just a flat texture.
In the end, I settled on an approach that makes use of various Blender modifiers:
I used this height map in a "Displace" modifier, to displace a very high-poly version of the roof:
I then ran the result through a "Decimate" modifier, to keep much of the shape, but reduce the polycount to usable levels:

This, applied to the actual roof, came out looking like this:
And all of these pieces reassembled, came out looking like this:
Some of it was a bit rushed, I'll admit. I relied too much on the same stamped alphas and could have put in more variation to the silhouettes of each piece.
Time constraints didn't let me spend as much time on each bit as I'd have liked, but I think the end result, with everything combined, does a good enough job.
A trim sheet might have been a smarter, more optimal way to do a lot of the work here, rather than sculpting each of these little bits, but equally, each piece is more unique because of it, and it does all fit nicely onto two maps.
If I'd been building multiple houses in this style, a trim sheet definitely would have been the way to go, but for this one-off, I think this works well enough.
There's also some decals to add, like the blue lines and strokes that are on the concept art.
The next job is to get it in engine, and then, honestly, just try and make the rest of it look as good as possible. With other modules to consider, I don't have the time to get everything I wanted into the scene, so I'll have to make do.


Comments
Post a Comment